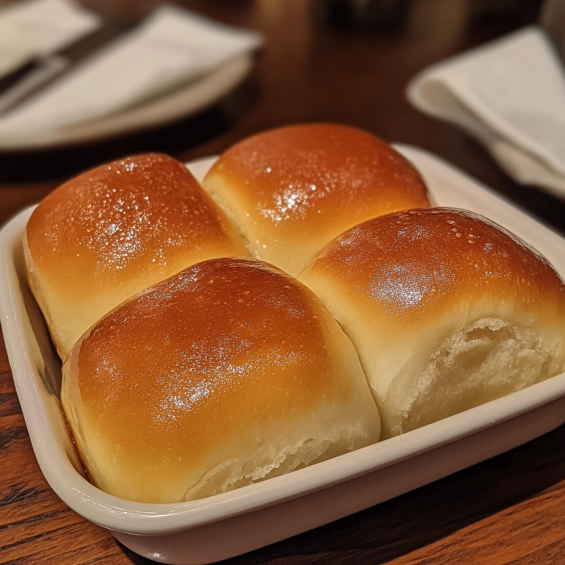
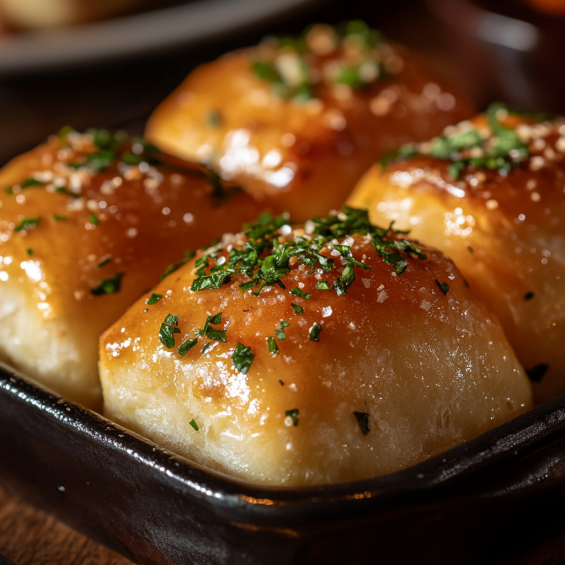
There’s something magical about the fluffy, sweet rolls served at Texas Roadhouse. Their combination of light, buttery texture and golden-brown crust make them an irresistible favorite. Whether you’re recreating the experience at home for a cozy dinner or preparing a treat for guests, these rolls are sure to impress. With this recipe, you’ll achieve that warm, soft, melt-in-your-mouth texture and the iconic flavor that people line up for.
Introduction
Texas Roadhouse rolls are a staple, renowned for their tender, slightly sweet dough and brushed with melted butter for that signature taste. The recipe below breaks down every step in detail, ensuring you create bakery-quality rolls at home. Pair these rolls with cinnamon honey butter for an extra touch of comfort and flavor.
Ingredients
For the Rolls:
- Active dry yeast: 2 ¼ teaspoons (or 1 packet)
- Warm water: ¼ cup (110°F)
- Whole milk: 1 cup, warmed to 110°F
- Granulated sugar: ½ cup
- Egg: 1, beaten
- Unsalted butter: 6 tablespoons, melted (plus extra for brushing)
- All-purpose flour: 4 cups (plus extra for dusting)
- Salt: 1 teaspoon
For the Cinnamon Honey Butter:
- Unsalted butter: ½ cup, softened
- Powdered sugar: 1 cup
- Honey: ¼ cup
- Ground cinnamon: 1 teaspoon

Step-by-Step Instructions
Step 1: Activate the Yeast
- In a small bowl, dissolve the yeast in warm water and let it sit for 5-10 minutes until it becomes foamy. This indicates the yeast is active.
- Set aside.
Step 2: Prepare the Dough
- In a large mixing bowl, combine the warm milk, sugar, and activated yeast. Stir until the sugar is dissolved.
- Add the beaten egg and melted butter to the mixture, stirring to incorporate.
- Gradually add the flour and salt, mixing continuously until a dough forms. You can use a stand mixer with a dough hook or knead by hand.
- Knead the dough on a lightly floured surface for about 8-10 minutes until it becomes smooth and elastic.
Step 3: First Rise
- Place the dough in a greased bowl, turning it once to coat the top. Cover the bowl with a clean kitchen towel or plastic wrap.
- Allow the dough to rise in a warm place for 1-2 hours, or until it has doubled in size.
Step 4: Shaping the Rolls
- Punch down the risen dough to release any air.
- Transfer the dough to a floured surface and roll it out to about ½-inch thickness.
- Cut the dough into 2-inch squares or rectangles using a sharp knife or a dough cutter.
- Place the dough pieces on a greased or parchment-lined baking sheet, spacing them slightly apart.
- Cover with a towel and let them rise for another 30-40 minutes.
Step 5: Baking
- Preheat your oven to 350°F (175°C).
- Bake the rolls for 12-15 minutes or until they turn golden brown.
- Immediately after removing them from the oven, brush the tops with melted butter for an extra layer of flavor and shine.
Step 6: Prepare the Cinnamon Honey Butter
- While the rolls are cooling, beat the softened butter, powdered sugar, honey, and ground cinnamon in a bowl until smooth and fluffy.
- Serve alongside warm rolls for dipping or spreading.

Serving and Storage Tips
Serving:
- Serve the rolls warm, fresh from the oven, with a generous dollop of cinnamon honey butter.
- These rolls pair perfectly with hearty meals such as roasted chicken, steak, or any home-cooked dinner.
Storage:
- Store leftover rolls in an airtight container at room temperature for up to 2 days.
- For longer storage, freeze the rolls for up to 1 month. Reheat in the oven at 300°F for about 10 minutes or until warm.
Helpful Notes
- Milk Temperature: Ensure the milk is warm but not hot; about 110°F is ideal. Too hot will kill the yeast, while too cold won’t activate it.
- Kneading: If you’re using a stand mixer, knead on medium speed for about 6 minutes. By hand, you’ll need closer to 10 minutes to reach the right texture.
- Dough Texture: The dough should be slightly tacky but not overly sticky. If it’s too wet, add a tablespoon of flour at a time while kneading.
Tips from Well-Known Chefs
- Chef Tip (From Paul Hollywood): Always ensure your dough rises in a draft-free, warm area. If your kitchen is cold, preheat your oven for a few minutes, turn it off, and let your dough rise inside.
- Chef Tip (From Ina Garten): When cutting the dough into squares, don’t twist your knife or cutter. Press straight down for rolls that rise evenly.
- Chef Tip (From Ree Drummond): Don’t skimp on the butter brushing at the end; it’s what gives the rolls their luxurious finish.
Frequently Asked Questions
1. Can I use instant yeast instead of active dry yeast?
Yes, you can. If using instant yeast, you don’t need to dissolve it in water first; simply add it directly to the dry ingredients.
2. Why didn’t my rolls rise?
This could be due to old or inactive yeast, or the dough being in a too-cold environment. Ensure your yeast is fresh and your kitchen warm enough for rising.
3. Can I make the dough ahead of time?
Yes! You can prepare the dough and store it in the refrigerator overnight for a slow rise. Let it come to room temperature before shaping and baking.
4. What can I use if I don’t have a stand mixer?
Kneading by hand is a great alternative. Just make sure to knead thoroughly until the dough is smooth and elastic.
5. Is there a gluten-free version of this recipe?
You can try substituting a gluten-free all-purpose flour blend, but the texture may vary. Be sure to add a binding agent like xanthan gum if your blend doesn’t already include it.
6. How do I make sure my rolls stay soft?
Store them in an airtight container once cooled. Brushing them with extra butter after baking also helps retain moisture.
7. Can I use salted butter for the dough?
Yes, but reduce the amount of added salt to avoid an overly salty flavor.
8. What type of milk is best?
Whole milk works best for richness, but you can use 2% or even almond milk for a lighter option.
9. Can I add herbs or garlic for a savory twist?
Absolutely! Mix in some minced garlic or chopped herbs into the dough or sprinkle on top before baking.
10. Why do my rolls have a hard crust?
This may happen if they’re baked too long or at too high a temperature. Be sure to follow the recommended times and brush with butter after baking.
These Texas Roadhouse-style rolls are sure to become a go-to recipe for family meals and gatherings. Enjoy their rich, homemade taste and warm, inviting aroma straight from your kitchen!
