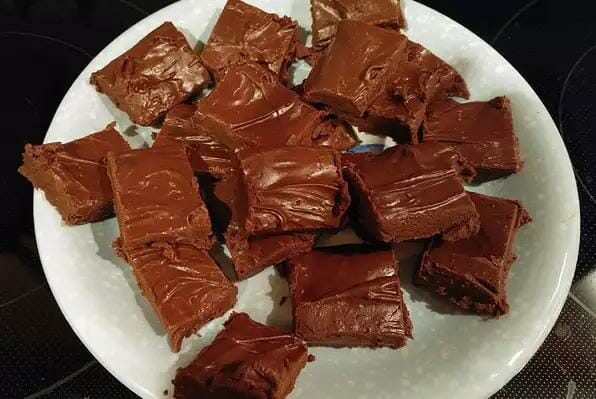
When I was a child my grandmother and her siblings owned a candy store. Since they lived in a different state, my grandmother would send us care packages filled with all sorts of confections. Fudge was a staple in every package, and we always polished it off first!
When I decided to make homemade fudge for the first time, I did not own a candy thermometer but thought I could make do without one. Clearly, I did not know the importance of using one and my first attempt at making fudge was a complete disaster.
There is also a learning curve when you begin your journey of making fudge. It is likely that you will have issues with the first few batches, and it is completely normal. Do not get frustrated or deterred – keep trying and you will master the craft!
Ingredients
3 cups sugar
2/3 cup cocoa powder (I prefer unsweetened Dutch processed)
1/4 cup salted butter (room temperature)
1/8 tsp. salt
1 1/2 cups whole milk
1 tsp. vanilla extract
Directions – Read Through the Directions and Notes Before Beginning
~ As you will see, certain things are in bold. That is to help because I know you want the fudge to be creamy and delicious and following the steps correctly is really important!
__________________________________
Butter an 8×8 inch square baking pan. Set aside.
Prepare the medium heavy saucepan that you will use by rubbing butter all over in the saucepan – especially up the sides.
Then, in that saucepan, stir together the sugar, cocoa, and salt. Add in the milk and stir with a wooden spoon (not a whisk or metal spoon).
Stir continuously over medium heat until the mixture comes to a strong boil – approximately 15 minutes.
Turn heat down to low medium, stop stirring, and let it cook for approximately 30 minutes, or until the temperature reaches 234 °F (112C) – Use a candy thermometer for an accurate reading. Remember – Do not stir after turning the heat to low medium.
When the temperature has reached 234 °F (112C) remove the saucepan from heat, (Do not stir), add the butter and vanilla. Again, do not stir. Leave the saucepan to sit until it has cooled to room temperature (110°F/43C) – approximately 30 minutes.
Once cooled to room temperature, stir continuously with a wooden spoon (only a wooden spoon!) until the mixture begins to lose glossiness – approximately 7 minutes. You do not want to under-beat the mixture, but you do want to stop stirring when the surface of the mixture starts to look dull or matte.
Pour into the prepared pan – spread it around if needed – and let cool completely.
When fully cooled, cut into squares. You can store it in an airtight container at room temperature for up to 2 weeks or in the fridge for 3-4 weeks.
Freezing the Fudge – wrap the fudge well in freezer wrap to keep moisture out, then place it in a heavy-duty freezer bag, squeeze the air out of the bag, and then seal it and place in the freezer. If kept well sealed, fudge can be frozen up to 3 months.
I always freeze some of the fudge because if I leave it in plain sight, all of it will be eaten by the end of the day. If I tuck some away in the freezer, there will be some for those days when a piece of fudge is badly needed!
Notes
* It is important to use a heavy pan that distributes heat well to prevent the mixture from sticking during cooking. Also, buttering the saucepan will help prevent the sugar from sticking to the sides and then crystalizing.
* Follow the directions carefully about when to stir and when not to stir. The specific nature of this is important to ensure that the sugar does not crystallize – also, the mixture may seize and become grainy which will ruin the fudge.
* You need to use a candy thermometer for an accurate temperature reading since temperature plays a critical role in the success of the fudge.
* If you do not have a candy thermometer, there is a technique you can try but it is not fool proof. First, drop a small bit of the mixture in a cup of cold water. A soft ball should form and if the ball flattens when pressed between your fingers, the mixture is ready for the next step.
