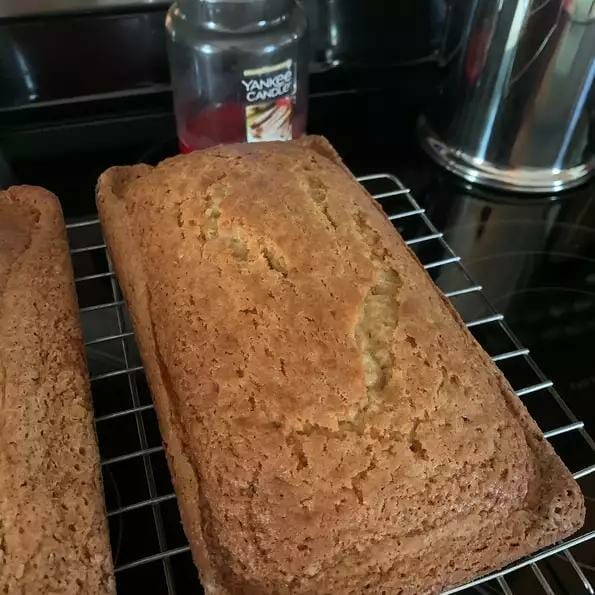
My first encounter with friendship bread goes back to my girl scout days, and I instantly fell in love with its sweet, delicious, and unforgettable taste. Making this unique yeast bread starts with creating the starter, which I remember feeling like a lengthy process. Indeed, it takes a little time to get the starter going, but once it’s ready, the bread-making and starter replenishing become a breeze.
To keep the instructions handy, you have multiple options. You can write them directly on the Ziploc bag using a permanent marker, print them on a label to stick onto the bag, or write/print them on a tag to attach to the bag. Whichever method works best for you is perfectly fine.
One of the best aspects of this project is how well it involves children. It’s an exciting experience for them to check the bag daily, write the instructions on the bags, and participate in baking the bread. The entire process becomes a wonderful bonding activity, fostering a sense of excitement and accomplishment in every step.
Without a doubt, friendship bread is a cherished project that brings joy to everyone involved. From creating the starter to baking the bread, it’s a journey filled with delightful moments and tasty rewards. Whether you make it with family, friends, or as part of a group activity, friendship bread is sure to create lasting memories and moments of togetherness. So, don’t hesitate to embark on this delicious adventure and let the joy of baking and sharing friendship bread fill your heart and home. Enjoy!
* This is only the recipe and instructions for the starter!
Ingredients
1/4 cup warm water (about 110°F)
1 package active dry yeast* (2 ¼ teaspoons)
1 cup all-purpose flour
1 cup granulated sugar
1 cup whole milk (you need the higher fat content)
Directions for Starter
Use glass bowls preferably, or plastic – do not use metal bowls or utensils.
Pour the warm water into a small glass bowl.
Sprinkle the yeast over the water. Let this stand for 5-8 minutes to allow it to bloom.
In a larger glass bowl, combine the flour and sugar with a wooden spoon.
Stir in the milk to the flour/sugar mixture.
Then stir in the yeast mixture.
Cover loosely with plastic wrap and allow it to stand until bubbly.
Once the mixture is bubbly, pour it into a gallon-size zippered plastic bag and seal. This counts as Day 1.
Directions for Developing the Starter
This is what you will write on the bags as instructions!
Do not refrigerate at all during this 10-day process. Allow the sourdough mixture to sit out at room temperature. If air gets inside bag, open the bag a bit, let the air out, and reseal.
Day 1: Do nothing.
Day 2: Mash the bag.
Day 3: Mash the bag.
Day 4: Mash the bag.
Day 5: Mash the bag.
Day 6: Add 1 cup each of all-purpose flour, sugar, and milk. Mash the bag until ingredients are well mixed.
Day 7: Mash the bag.
Day 8: Mash the bag.
Day 9: Mash the bag.
Day 10: Pour the sourdough mixture from the Ziploc bag into a glass (or other nonmetal) bowl. Add ½ cup each of all-purpose flour, sugar, and milk. Mix well with a wooden spoon.
Divide out 1 cup portions of the starter, placing each one-cup portion in separate zippered plastic bags. You’ll get about 4-5 bags.
Securely seal the bags.
The bags of starter are ready to give away to friends along with the instructions. But keep one for yourself!
The starter then goes back to Day 1 to build it back to the sharing quantity.
Notes
1. Have sturdy gallon freezer Ziploc plastic bags (for easily storing the starter), glass bowls, and wooden spoons on hand. For sourdough, you don’t want to use metal bowls or utensils. Sourdough is acidic and can dissolve certain metals. It’s best to use anything but metal bowls and utensils.
2. Before filling the Ziploc bags, write the directions right on the bags using a permanent marker so you never have to go hunting for the directions.
3. While you are working your way through the 10-day process, store the starter at room temperature. If the Ziploc bag gets air in it, simply let it out.
4. How much sourdough you end up with at the end of the 10-day process depends on how active your sourdough is. You’ll end up with about 5-6 cups.
5. On Day 10 after you add last bit of all-purpose flour, sugar, and milk, separate out 1-cup portions into Ziploc bags (don’t forget those directions on the front!).
6. At this point, you can give away all but one of those starter bags to friends along with the recipe and instructions so they can indulge in their own friendship bread.
7. You need to keep a bag of starter for yourself to continue the sourdough process (Day 10 is equal to Day 1) and make the Amish Friendship Bread with one of the other cups of starter.
8. If you can’t find anyone who wants the sourdough starter, simply throw those 1-cup bags into the freezer until another time when you’d like to start the sourdough process or bake the bread.
9. When you pull the sourdough out of the freezer and want to make a batch of starter, treat it as Day 1. Or to make the bread straight away, just go ahead and use that cup to bake loaves of friendship bread!
Conclusion:
The Amish Friendship Bread Starter is more than just a recipe; it’s a journey of delightful flavors and heartwarming connections. From my very first taste of this sweet yeast bread as a girl scout, I knew it was something special and unforgettable. The process of creating the starter may seem a bit time-consuming initially, but once it’s ready, the rewards are endless.
The magic of this starter lies not only in the delicious bread it yields but also in the sense of community and friendship it fosters. Sharing the starter with friends and family, watching it grow and transform, and passing it along to others creates a beautiful chain of connections that transcends distance and time.
I’ve found that keeping the instructions handy is easy with options like writing them directly on the Ziploc bag, using labels, or attaching a tag. This makes it simple for anyone to join in on the fun, and it’s a fantastic project for children to be involved in too. Checking the bag daily, writing the instructions, and eagerly anticipating the bread baking process becomes a joyous and rewarding experience for all.
In the end, the Amish Friendship Bread Starter is not just a recipe to be followed; it’s an experience to be cherished. It brings people together, creates fond memories, and fills homes with the delicious aroma of freshly baked bread. So, why not embark on this heartwarming journey of friendship and deliciousness? Gather your loved ones, share the starter, and watch the magic unfold as the Amish Friendship Bread brings joy and warmth to your hearts and homes. Enjoy the sweet taste of friendship and the everlasting bond it creates!